5 Ways to Soundproof Existing Electrical Outlets Effectively
In my experience, soundproofing a room is only as effective as its weakest point. An area that’s commonly overlooked when soundproofing are electrical outlets. If you’re about to start work on your room, you might be wondering how to soundproof existing electrical outlets. Here’s a quick answer:
To soundproof existing electrical outlets, you need to fill the space around them with an appropriate material. The best things for this job are either acoustic caulk or acoustic putty, as they dampen any flanking noise that might transmit through the socket.

In this article, I’ll look at the problems associated with flanking noise along with the best ways to soundproof existing electrical outlets.
As an affiliate, I may collect a share of sales or other compensation from the links on this page.
What is Flanking Noise?
The 2 most common types of sound transmission are impact and airborne. Both of these rely on direct sound transmission from the source to a material (albeit through the air in the case of airborne sounds).
But there is a third type of sound transmission: flanking noise.
This is defined as the indirect transmission of sound between spaces, typically going over or around a surface or object.
Flanking sounds will either be airborne or impact at their origin, but become flanking noises when their direct path is interrupted.
For example, noise traveling through a wall from one room to another would be considered direct noise transmission.
But noise traveling from one room to another through materials that aren’t the separating wall would be considered flanking noise. These might include:
- Sound vibrations passing through a shared floor surface.
- Sound passing through shared ceiling joists and materials.
- Noise transmitting through an open space, such as a HVAC vent.
- Sound entering or exiting through the gaps around an electrical outlet.
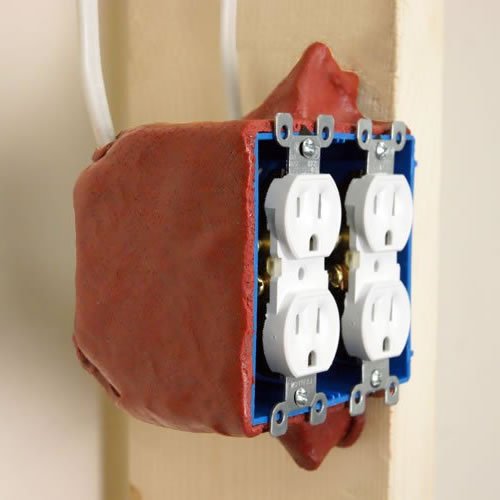
Electrical outlets might not be the main concern in a room when you’re soundproofing, but there’s little point in spending time working on a wall if sound can escape through its wall outlets.
What’s more, when outlets are installed, a hole is cut in the drywall and the outlet box is screwed in. At most there might be some sealant applied round the edge, but this often isn’t the case.
The resulting gaps can allow sound to enter and exit a room fairly easily. Much like a gap around a door, even this small space is enough for sound transmission.
Ideally, soundproofing electrical outlets would be done when you install them for the first time. If so, you’d get much better results.
For example, you could be more careful about how they’re fitted to the drywall and could avoid fitting 2 outlets in the same stud cavity.
But if that’s not an option, you’re a bit more limited with what you can do. There are still some options for soundproofing your existing electrical outlets though.
How to Soundproof Existing Electrical Outlets
There are 5 ways to soundproof electrical outlets and they are:
- Use acoustic putty
- Fill the cavity around the outlet with mineral wool
- Decouple the electrical outlet
- Replace outlet with a soundproof outlet box
- Fill the cavity around the outlet with acoustic caulk
When soundproofing electrical outlets, you’ll mainly be working to block flanking noise. But if they’re poorly installed, you’ll also need to focus on direct sound transmission too.
Before starting, be sure to turn your mains electricity off. Even if you’re not directly disconnecting any wires, you don’t want to risk shocking yourself.
Also, if you’re unsure what you’re doing, call an electrician and explain these steps. They’ll likely be able to give you a hand.
Finally, ensure any products you fit around the electrical outlet are fire-resistant. The last thing you want to do is surround an outlet box in something that’s highly flammable.
1. Use acoustic putty
Acoustic putty is a sound damping compound that can help to reduce resonance while also absorbing sound waves.
The benefit of using it here is that it’s malleable and easy to work around the existing electrical outlet.
It’s not a common product, but these putty pads (Amazon link) are specifically designed to use on wall outlets.
Their primary job is to improve fire resistance, but they also work for sound damping. In short, they’re perfect for this job.
Follow these steps:
- Gain access to the outlet box. This might mean cutting away some drywall.
- Unscrew it from the joist and pull it out of the wall.
- Mold some putty around the sides and back, making sure there are no gaps.
- Put the outlet box back in its place and screw down.
- Repair the wall around the outlet, sealing with acoustic caulk.
Be sure there’s as little a gap as possible (if any) between the outlet box and the wall. If there is, you can fill this with some more acoustic putty or caulk.
Also, make sure the wires can still leave the back of the outlet box freely. This putty is fire resistant but that doesn’t mean you should stick it all over the wires.
Finally, NEVER put the acoustic putty inside the outlet box. It should only ever go on the outside.
2. Fill the cavity around the outlet with mineral wool
 It’s common for stud walls to have an empty cavity between the 2 sheets of drywall. This space is perfect for amplifying noises from elsewhere.
Regardless of whether you’re stopping noises from entering or escaping the room, insulating the cavity around the electrical outlet will reduce the problem.
The best product you can use for this is mineral wool insulation (Amazon link). It has good sound absorption properties but is also heat resistant up to 1200F. This means that if there is a fire, it’ll provide a bit of protection.
You don’t need to stuff it in tightly around the outlet. In fact, it should be loosely packed into the wall cavity to be most effective.
It usually comes in sheets around 2” thick; there shouldn’t be any need to pack it tighter than how it arrives.
3. Decouple the electrical outlet
Decoupling is the process of mechanically separating 2 surfaces, such as the 2 sides of a stud wall.
This process is also possible to a degree with electrical outlets.
Typically they’ll be fixed to either the wall stud or the drywall depending on the design. But you can get away with isolating them fairly easily.
For this process, you’ll just need 4 pieces of 2×4 cut into 1’ lengths. You’ll also need some screws and some Green Glue (Amazon link). Check out my review of Green Glue noiseproofing compound.
Follow these steps:
- Cut away the drywall to expose the outlet box. Remove this.
- Screw a piece of wood on either side of the hole so that it’s completely hidden by the drywall.
- Take the other pieces of wood and coat liberally in Green Glue. Fix them to the first pieces inside the hole.
- Mount your electrical outlet onto these pieces of wood. It’ll now be recessed inside the wall cavity.
- Replace the drywall, cutting new pieces to fill the recess if necessary.
- Seal any gaps and holes with Green Glue.
This process isn’t exactly the same as decoupling, but it’s the closest you’ll be able to do in the circumstance.
The aim is to put a separation barrier between the outlet box and the wall it’s mounted on.
Using Green Glue helps with this because it’s a sound damping compound. It’s flexible and converts sound energy into heat, meaning there shouldn’t be any sound transmission between the outlet box and the wall, or vice versa.
Just bear in mind that your electrical outlet will now be slightly inside the wall, but this shouldn’t really be a problem; it’ll only be recessed by around 1”.
4. Replace outlet with a sealed outlet box
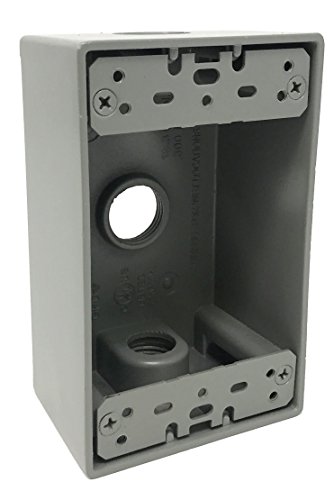 As part of the soundproofing process, it’s worth replacing your current outlet housing with an outdoor version.
Outdoor electrical sockets (Amazon link) are weatherproof, meaning they’re completely sealed against water.
This’ll make a surprising difference when it comes to sound transmission, and you can still run your normal indoor electrical outlets from it.
It’s still worth coating the outside in acoustic putty just to be on the safe side, particularly if you’re breaking into the wall to replace the box.
5. Fill the cavity around the outlet with acoustic caulk

Rather than using mineral wool insulation, another option is to fill the surrounding cavity with acoustic caulk.
This is a better option if you don’t plan on taking the whole wall down and just want to make a minor adjustment around the electrical outlet.
You can use Green Glue for this job. Fill the surrounding cavity with it in stages, waiting for it to dry each time.
Alternatively, you could use expanding foam (Amazon link). This foam insulation is designed to block the passage of fire through empty cavities, making it perfect for this job.
Although designed to stop fire, it should have good sound damping properties too.
Some Final Thoughts
Although deciding how to soundproof an existing electrical outlet might be a challenge, there are a few options.
My final bit of advice is simply related to safety. Be careful with how you approach this challenge, as working with electricity can be dangerous if you don’t know what you’re doing.
But if you do, best of luck with this project!