How to Stop Neighbor’s Loud Music from Bothering You
It’s reasonable to believe that nearly everyone has experienced living next to a noisy neighbor at some point. In fact, one of the most frequently asked questions I receive is, “How can I prevent a neighbor’s loud music from disturbing me?” Fortunately, resolving this issue is not that challenging.
The easiest way to stop a neighbor’s loud music from bothering you is to soundproof the wall. While this can be done, to an extent, with normal household items, it’s best to use dedicated soundproofing materials with the correct kind of mass if you can.
In this article, I look at the best ways to drown out your neighbor’s loud music. As with any soundproofing project, the results will depend on how much effort you put into the job. And, as always, plan everything ahead so you can keep track of your budget and progress.

As an affiliate, I may collect a share of sales or other compensation from the links on this page.
Blocking out loud music – where to begin
The first step in any soundproofing project is to understand how sound travels, as this will help you to work out the best plan of action. While music is characteristically airborne noise (meaning it travels through the air), it’s likely you’re actually dealing with impact noise.
Impact noise refers to sound waves travelling through an object, such as a wall. The sound waves cause the surface to vibrate, which transfers the sound waves through the object and out the other side.
Providing the sound is loud enough, effectively all frequencies will be able to pass through the wall. However, it’s typical that bass frequencies travel further through objects because the waves use less energy to move. Identifying the problematic frequencies will also help to decide on a plan of action.
Along with understanding how sound waves work, it’s also useful to know what kind of wall you’re working with. The most common types will be a standard brick and mortar wall, or an internal stud wall. Brick walls are obviously more solid, meaning it’s harder for sound waves to travel through them.
However, in buildings such as apartment blocks, it may be more common for the wall to be stud. This is usually made from drywall or plasterboard, which is a fairly flimsy material in the grand scheme of things. Importantly, this means it’s easy for sound waves to travel from your neighbor’s room into your own.
How to block out your noisy neighbors
Having a basic understanding of how sound waves work will make this project much easier because you’ll know the best way to combat the problem. However, the bottom line when it comes to soundproofing a room is to simply add more mass.
Mass makes the wall heavier, which makes it harder for sound waves to pass through. Along with adding mass, you can try techniques such as decoupling, which will be discussed in this article.
My top tip when it comes to soundproofing a wall is to try several things for the best results. This is because different types of mass will be effective against different frequencies, so adding several will provide something of a full spectrum approach.
Below are my main solutions for soundproofing a partition wall you share with a noisy neighbor. I’d recommend following the order of these solutions, but at the same time feel free to use as many or as few as you want. If you decide to use them all, then definitely follow the order suggested here.
1. Fill the gaps
As the following solutions involve adding things to the wall, it’s best to start by working on the base surface. I’d recommend treating the original wall first, and while this won’t make the biggest difference to noise pollution levels, it’ll make enough of a difference to justify doing it.
The first step is to fill any gaps in the wall, as sound waves can leak through even the tiniest gaps. Think of soundproofing like waterproofing (or heat insulation), as all 3 follow the same basic principles.
On a brick wall, gaps might be due to the house settling, or from fixing things to the wall. On drywall, it can be as simple as covering the joins between panels, or fixing any possible gaps around the edges.
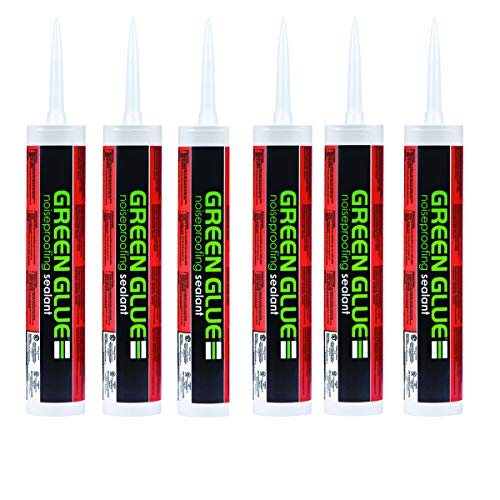
The best thing to use for this is acoustic sealant. The major brand is Green Glue (see it on Amazon), which has become a universal term for most acoustic sealants. The benefit of this product over normal sealant is that it remains elastic, which improves its soundproofing properties.
The easiest way to work with the product is to squeeze some into the gap and then smooth it off with a knife. Unlike normal sealant, the elasticity of this product makes it basically impossible to sand when dry, so I’d recommend getting it as smooth as possible while it’s still wet.
This stage is also a good time to locate any weak points on the wall, particularly as you’ll be getting up close and personal with it. Weak points should receive a bit of extra treatment in the later stages of the project.
2. Add mass loaded vinyl
Mass loaded vinyl is one of the best products for almost every soundproofing project, and is designed specifically for this purpose. It’s what’s called limp mass, which means it’s very heavy and has little elasticity. In short, this means sound waves basically hit it and can’t pass through.
While that’s all you really need to know for this project, this video has all the information you could need about mass loaded vinyl.
MLV can be applied directly to the wall, but you might find this difficult to do. The easier solution is to fix it to drywall first and then attach this to the wall, simply because it’s easier to work with. Also, this adds a bit more mass, which is never a bad thing in a soundproofing project!
MLV works particularly well at blocking mid-range frequencies, and will have an impact on bass frequencies, although these will require a bit more effort to block out completely.
3. Add some absorption
Along with mass, the next most important thing to do is to add some acoustic insulation. This does the same job as normal insulation because it traps the sound waves in its open structure, but the material’s density stops them from escaping again.
Ideally, acoustic insulation works best when put in the stud wall’s cavity, but this means having to take the original wall down. While this might not be a problem, many may find it easier to add it to their side of the wall. However, this will obviously reduce the size of your room.
Unlike standard thermal insulation, which is usually made from fiberglass, acoustic insulation such as Rockwool is made from rock mineral. More than anything, this means it’s much safer to work with, and also has fire retardant properties.
Rockwool comes in blocks, although some other brands might produce it in rolls. The blocks are much easier to work with because they’re more rigid, and you should have an easier time cutting them to size and fixing them in place.
This video shows you how to insulate against sound using Rockwool, and while it focuses on a floor, the principle is exactly the same for a wall. You’ll need to cover the Rockwool with another sheet of drywall, which is why it works best in the wall cavity so that you don’t lose too much space in your room.
4. Use acoustic drywall
If you do need to add more drywall to the structure, then it might be worth using acoustic drywall. Normal drywall is made of two sheets sandwiched together, whereas acoustic drywall has extra soundproofing materials in the middle.
Typically this extra layer will be something like MLV, which we know is effective at soundproofing. Similarly, the drywall itself can often be specifically for soundproofing projects and therefore is denser than normal drywall.
Different brands will build their acoustic drywall differently, and by extension will have different thicknesses for their products. I wouldn’t recommend going any thinner than 30mm (1 inch) as anything thinner won’t give you the level of soundproofing you need to block out loud music from next door.
Acoustic drywall can simply be screwed to the surface below it, meaning you could add it over all the other layers, or directly on to the existing wall. Bear in mind that it’s more expensive than normal drywall, and will be slightly harder to source.
5. Decoupling
Decoupling is arguably the most effective way to soundproof a shared wall, but also requires the most work. For starters you’ll need access to the internal wall studs, which will mean at least taking down your side of the wall. As you can probably tell already, you can’t really do this on brick walls.
In short, the process involves separating the two sides of the wall to prevent sound waves from passing through. Each side of the wall is attached to its own set of wall joists, meaning that any sound waves that enter one side get stopped in their tracks before passing into your room.
Trademark Soundproofing has a very helpful guide that goes through all the important details of decoupling a wall. The biggest effort will be creating a new set of wall studs, which might be beyond the capabilities (and budget) of many.
Luckily, an alternative is to use resilient channels, which basically do the job of decoupling without you having to build a new set of studs in the wall. Resilient channels are basically strips of metal, which the drywall is then attached to.
The resilient channels are made from metal but are surprisingly flexible. This does exactly the same job as decoupling because it prevents any sound waves from reaching the stud wall. This method is both cheaper and easier than full decoupling, but by extension isn’t as effective as the full process.
Decoupling is basically an alternative method to the first 4 steps, although it’ll still be possible to add mass to the wall once it’s up again. Although decoupling is effective, you can never go wrong with more mass.
One of the most important steps in decoupling is filling the wall cavity with mass. The dead air within the wall cavity actually creates a fairly good echo chamber, which can amplify any sound waves that enter it. Luckily adding insulation stops this from happening.
Rockwool or thermal insulation is the best thing to use here, and the more you can fit in the better. The trick is to trap the sound waves in the wall cavity so they have less chance of passing into your room. Also, putting the insulation inside the wall means you don’t need to add the layer on the outside of the stud wall.
- Make sure you fill any gaps inside the wall with Green Glue while you’re in there.
- Sound clips (which have rubber plugs in them) make a great alternative to resilient channels.
- When replacing the drywall, favor thick over thin, as this is an easy way to add more mass to the existing structure.
- Decoupling is very effective at blocking out all frequencies, and is the most effective at blocking bass.
- That said, adding more mass to the wall (and inside the cavity) will always help.
Some final thoughts
Stopping a neighbor’s loud music isn’t a particularly difficult job, but does require a bit of work. The steps listed above should be fairly easy even for those with little DIY knowledge, although decoupling does take a bit more skill.
If you decide to decouple your wall, which is probably the most effective solution, I’d recommend investigating resilient channels first. These are the easiest way to achieve the desired results, and definitely require less work.


