MLV vs. Dynamat for Soundproofing Cars
I recently started the process of trying to soundproof my car and found there are plenty of good materials for the job. This got me wondering about the benefits of MLV vs. Dyanmat for soundproofing cars, so I did some research. Here’s a quick answer:
Dynamat is designed specifically for cars and helps deaden engine and road vibrations. MLV blocks and dampens sound waves. Dynamat also has thermal insulation and is a better choice in cars if you want to make the interior quieter. But MLV is a better choice if you want to reduce outside noise.
Also read: Green Glue vs. MLV

In this article, I’ll go over the specific differences between MLV and Dynamat to help you understand which will be better for soundproofing your car.
As an affiliate, I may collect a share of sales or other compensation from the links on this page.
The Differences of MLV vs. Dynamat
MLV is short for mass loaded vinyl (Amazon link). It’s a well known and widely used soundproofing material that’s pretty good at its job.
It’s made from 2 outer layers of vinyl with an interior core of either barium sulfate or calcium carbonate. The vinyl provides flexibility and the core provides dense mass.
Importantly, MLV is what’s known as limp mass. This means that when sound waves make contact they’re unable to pass through. Instead, they dissipate off its surface, and, to a lesser extent, are absorbed.
MLV has several useful properties for soundproofing. These include:
- It has high mass for its size
- It’s dense
- It’s flexible
So, along with blocking sounds, MLV also helps with sound dampening. This means is reduces vibrational energy before it can turn into sound waves. In an enclosed space like a car, which sees plenty of vibrations, this is a useful quality.
But what about Dynamat? Dynamat (Amazon link) is a brand name for what’s known as a vehicle sound deadener.
Sound deadening is a fairly similar concept to sound dampening in that the material is designed to reduce vibrational energy, which reduces the occurrence of sound waves.
So, on the surface, both products would appear to do the same thing. But there are finer details worth considering.
Most importantly is the construction of Dynamat. As a vehicle sound deadener, it’s specifically designed for this kind of application.
It’s made primarily from butyl rubber, which is another form of limp mass. However, butyl rubber is used for its fire retardant properties, meaning it doesn’t burn easily (if at all).
Also, Dynamat has a foil coating to improve thermal insulation. This is particularly useful when used under a car’s bonnet and in the interior, as it helps to reflect heat away from the cabin.
What’s more, Dynamat has a self-adhesive backing. Again, this is because it’s designed for use in a car, and is much easier to install.
As you can see, MLV and Dynamat do fairly similar jobs, but their key differences lie in their construction. I’ll explain what this means for soundproofing a car in more detail below.
Comparing MLV and Dynamat
You can probably already appreciate what some of these differences mean for soundproofing a car. However, to make it easier, here’s a comparison chart:
| MLV | Dynamat | |
| Cost | Low-to-mid | High |
| Materials | Vinyl, barium sulfate | Butyl rubber, foil |
| Thickness | 0.0125” | 0.067” |
| Density | 1-2lb per sq. ft. | 0.45 per sq. ft. |
| Ease of application | Moderate | Easy |
| Fire retardant | No | Yes |
| Soundproofing | Blocking and deadening | Deadening |
| STC | 32 | 28 |
On the surface, it might seem like MLV is the winner here. In general terms, it probably is. It has a higher density per area and a higher sound transmission class (STC).
Sound transmission class is a rating used in soundproofing. The higher the number, the greater a material’s sound isolation properties.
However, on its own, this isn’t as important as it is when considered alongside other factors. A material can have a really high STC and be let down by its application and surrounding materials.
There are several other important factors to consider when making this decision too. Perhaps the most important is the cost to effectiveness ratio.
MLV is, on paper, the more effective product. It’s also the cheaper of the two. So why would you choose Dynamat?
In short, Dynamat is specifically designed for applications in vehicles. It might be more expensive, but if you do some research online you’ll see how many people sing its praises.
Along with its sound deadening properties, it has the benefit of being a thermal insulator too. This is useful if you’re lining the vehicle’s interior, as it’ll stop heat transferring through from the engine, and will stop the car from losing heat from the cabin.
Finally, we need to consider ease of installation. I’ll detail the steps below, but it’s worth considering it briefly here.
Dynamat is designed for installation in vehicles. It has an adhesive backing, which you just need to peel off and stick down. This is really straightforward.
MLV, on the other hand, would need some kind of adhesive. While this isn’t a massive issue, it’s just another step to add.
What’s more, MLV is quite difficult to work with because it’s so dense. Dynamat has the upper hand here because it’s much more flexible, making it easier to fit into smaller gaps.
So while MLV is the more effective soundproofing product, it loses marks for things like ease of installation. That said, I wouldn’t make your decision just yet, as it’ll probably be useful to read through the installation processes first.
Installing MLV in Your Car
The process of installing MLV in a car is a bit more complicated, so I’ll go through it first.
Realistically, both jobs will take a bit of work, but this one has slightly more steps.
Here’s a rundown of how to install MLV in your car.
1. Remove the car’s interior
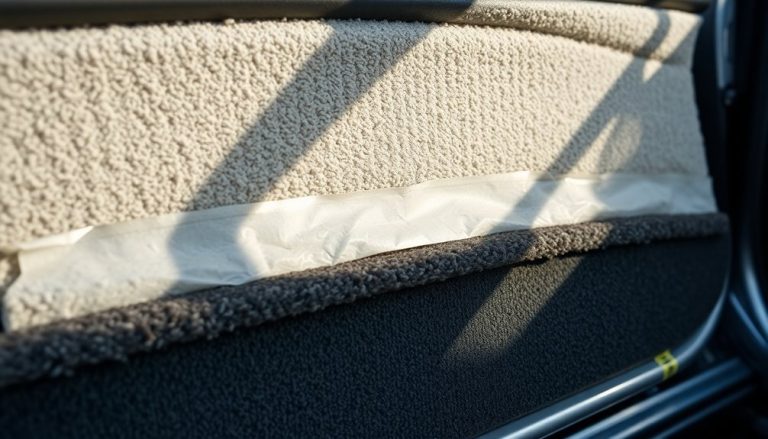
The first step is to remove door panels and carpets. Obviously, you can probably leave the seats in place, but taking them out too will help with installation.
In short, you want to remove as much as possible and expose bare metal, as this is where you’ll install the product.
2. Cut your sheets to size
MLV usually comes in either sheets or rolls. Regardless, you’ll need to cut the pieces to size before you start installing.
Measure door panels, floor, roof, etc., and cut your sheets to size. Larger areas might require more than one piece, so divide them up appropriately.
3. Start installing
I’d recommend starting at the top and working down, but do whatever works best for you. However, you go about it, be methodical.
Usually, you’d install MLV using screws, nails, or staples, but that won’t be possible here.
Instead, you’ll need to get hold of some strong adhesive. Something like PVC glue will be best.
However, be careful about what type of glue you use, as stronger solvent glues will dissolve the vinyl. This can produce dangerous fumes and lead to a big mess.
Ideally, use something like vinyl cement or PVC glue.
You’ll need to coat the backside of each piece of MLV and then stick in place. It might help to run over the surface with a roller or hold it in place with some clamps if possible.
4. Seal gaps
If you find there are some small gaps left open, or the edges of sheets aren’t stuck down properly, break out the Green Glue.
Green Glue is a sound deadening acoustic caulk and so does much the same job as MLV, just in liquid form.
This makes it ideal for filling small gaps that you can’t fit the MLV in.
Bear in mind it does take 30 days to cure properly, but it’ll be dry enough after 48 hours.
5. Refit the interior
Finally, you’ll need to reinstall the car’s interior. This’ll be a fairly easy job, but you’ll likely need more adhesive or longer screws, depending on how everything was fitted.
Installing Dynamat in Your Car

Generally speaking, installing Dynamat is a bit easier because you don’t need to mess around choosing the right adhesive.
Here are the steps for installing Dynamat in your car.
1. Remove the interior
Just as before, you’ll need to start by removing the car’s interior. With Dynamat, there are more possible areas of application, such as under the bonnet, so clean those areas up too.
2. Measure your sheets
Dynamat comes in sheets, meaning there’ll be less cutting and measuring. For the most part, you can probably apply sheets and cut them to size during, but for more fiddly areas it’ll still be helpful to measure them out.
3. Install the sheets
Again, it makes sense to work from the top down. Also, to install Dynamat, you’ll need a set of rollers. These help to get the best bond.
Peel the backing off in one corner and stick it down. Then, moving carefully, peel the backing off and stick the sheet down at the same time.
Run the roller over the surface and use it to push the mat into tight corners and crevices.
Some people recommend using a heat gun too, but this isn’t completely necessary.
4. Cover other areas
Dynamat also sells packs specifically for trunks and under the hood.
The main difference is the thickness, but if you’re planning on doing the whole car I recommend buying these specific sets.
Installation is exactly the same, but you’ll need to spend some time cleaning the hood first to ensure the bond is as strong as possible.
5. Refit the interior
Another benefit of using Dynamat is that you don’t need to wait for glue to dry, so you can just get on and refit the interior.
Again, work methodically through the interior, starting with carpets and moving on to door panels.
Of course, removing and installing the interior might be a challenge. If you don’t want to take it on, consider contacting a mechanic as they should be able to help.
Which is Better, MLV or Dynamat?
All of these points end in the obvious question: which is better, MLV vs. Dynamat, for soundproofing a car?
In my opinion, Dynamat offers a better product for this specific application.
MLV is the better soundproofing product overall, but it loses marks for being slightly more difficult to install.
Dynamat, on the other hand, shares many of the same positive properties with MLV but is specifically designed for use in vehicles. I feel this makes it the superior product in this situation.
MLV wasn’t designed with a single application in mind. It’s a general use soundproofing material that blocks and deadens sound waves.
It’s particularly useful when working with large flat surfaces, such as walls. When it comes to applying it to fiddly areas, such as vehicle interiors, it definitely falls short.
However, you also have to consider exactly what it is you want from the process of soundproofing your car. After all, soundproofing is a fairly general term that can be broken down into several different categories.
For example, MLV would be the better product if you literally want to soundproof your car. By this, I mean that you want to block out exterior noise, such as that of other cars and road traffic.
Dynamat, on the other hand, is better if you want to reduce the amount of noise coming from the car that makes its way into the car’s cabin.
This includes engine noise and sound made by the car driving on a road. This is subtly different from simple exterior noise.
Dynamat is made with the idea of deadening in mind. It prevents vibrations from building into sound waves, which is commonly caused by the engine vibrating and the car driving on a road.
Some Final Thoughts
Hopefully, this article has given you some useful information on the debate of MLV vs. Dynamat for soundproofing cars.
In my opinion, Dynamat is the superior overall product because it’s designed for this purpose. But it also entirely depends on what you actually want to achieve.
I recommend spending a bit of time thinking about your goals and budget, as these are the 2 most important factors when deciding on the right product.